I have recently been scanning leaves with a flatbed scanner using a piece of black velvet as a background. This is a great way to take high-resolution photographs of flat objects like leaves that will fit on the scanner bed, and the black velvet makes the colors really stand out. The only problem is that when you scan velvet, you get a lot of flecks of light reflected from the fibers of the fabric instead of a solid black background. I used to get rid of them by manually painting over them, but this was very labor intensive when working near the edge of the subject. Here is a new technique that does it much faster:
1) Open the image and start the Composite transformation, selecting black (or whatever color you want the background to be) as the solid overlay color. Now the task is reduced to creating a mask for the input image that is white where you want to background color and black where the subject is.
2) Click the white square in the Amount control and select New Mask from the popup menu.
3) Select the flood fill mask tool and click on the background. This fills in most of it but leaves hundreds of little holes where light reflected off the velvet. You can try increasing the threshold to get rid of some of them, but at some point you start eating into the darker parts of the subject so there is a limit to how high you can go.
4) Select the median filter mask tool and set a radius big enough to cover most of the holes and click Apply. This gets rid of all but the largest holes in the mask without disturbing the edges between the mask and subject significantly.
5) Click OK on Composite to fill in the background.
6) Use the Speck Removal tool, if necessary, to get rid of the few remaining larger spots, if any, that the mask did not eliminate.
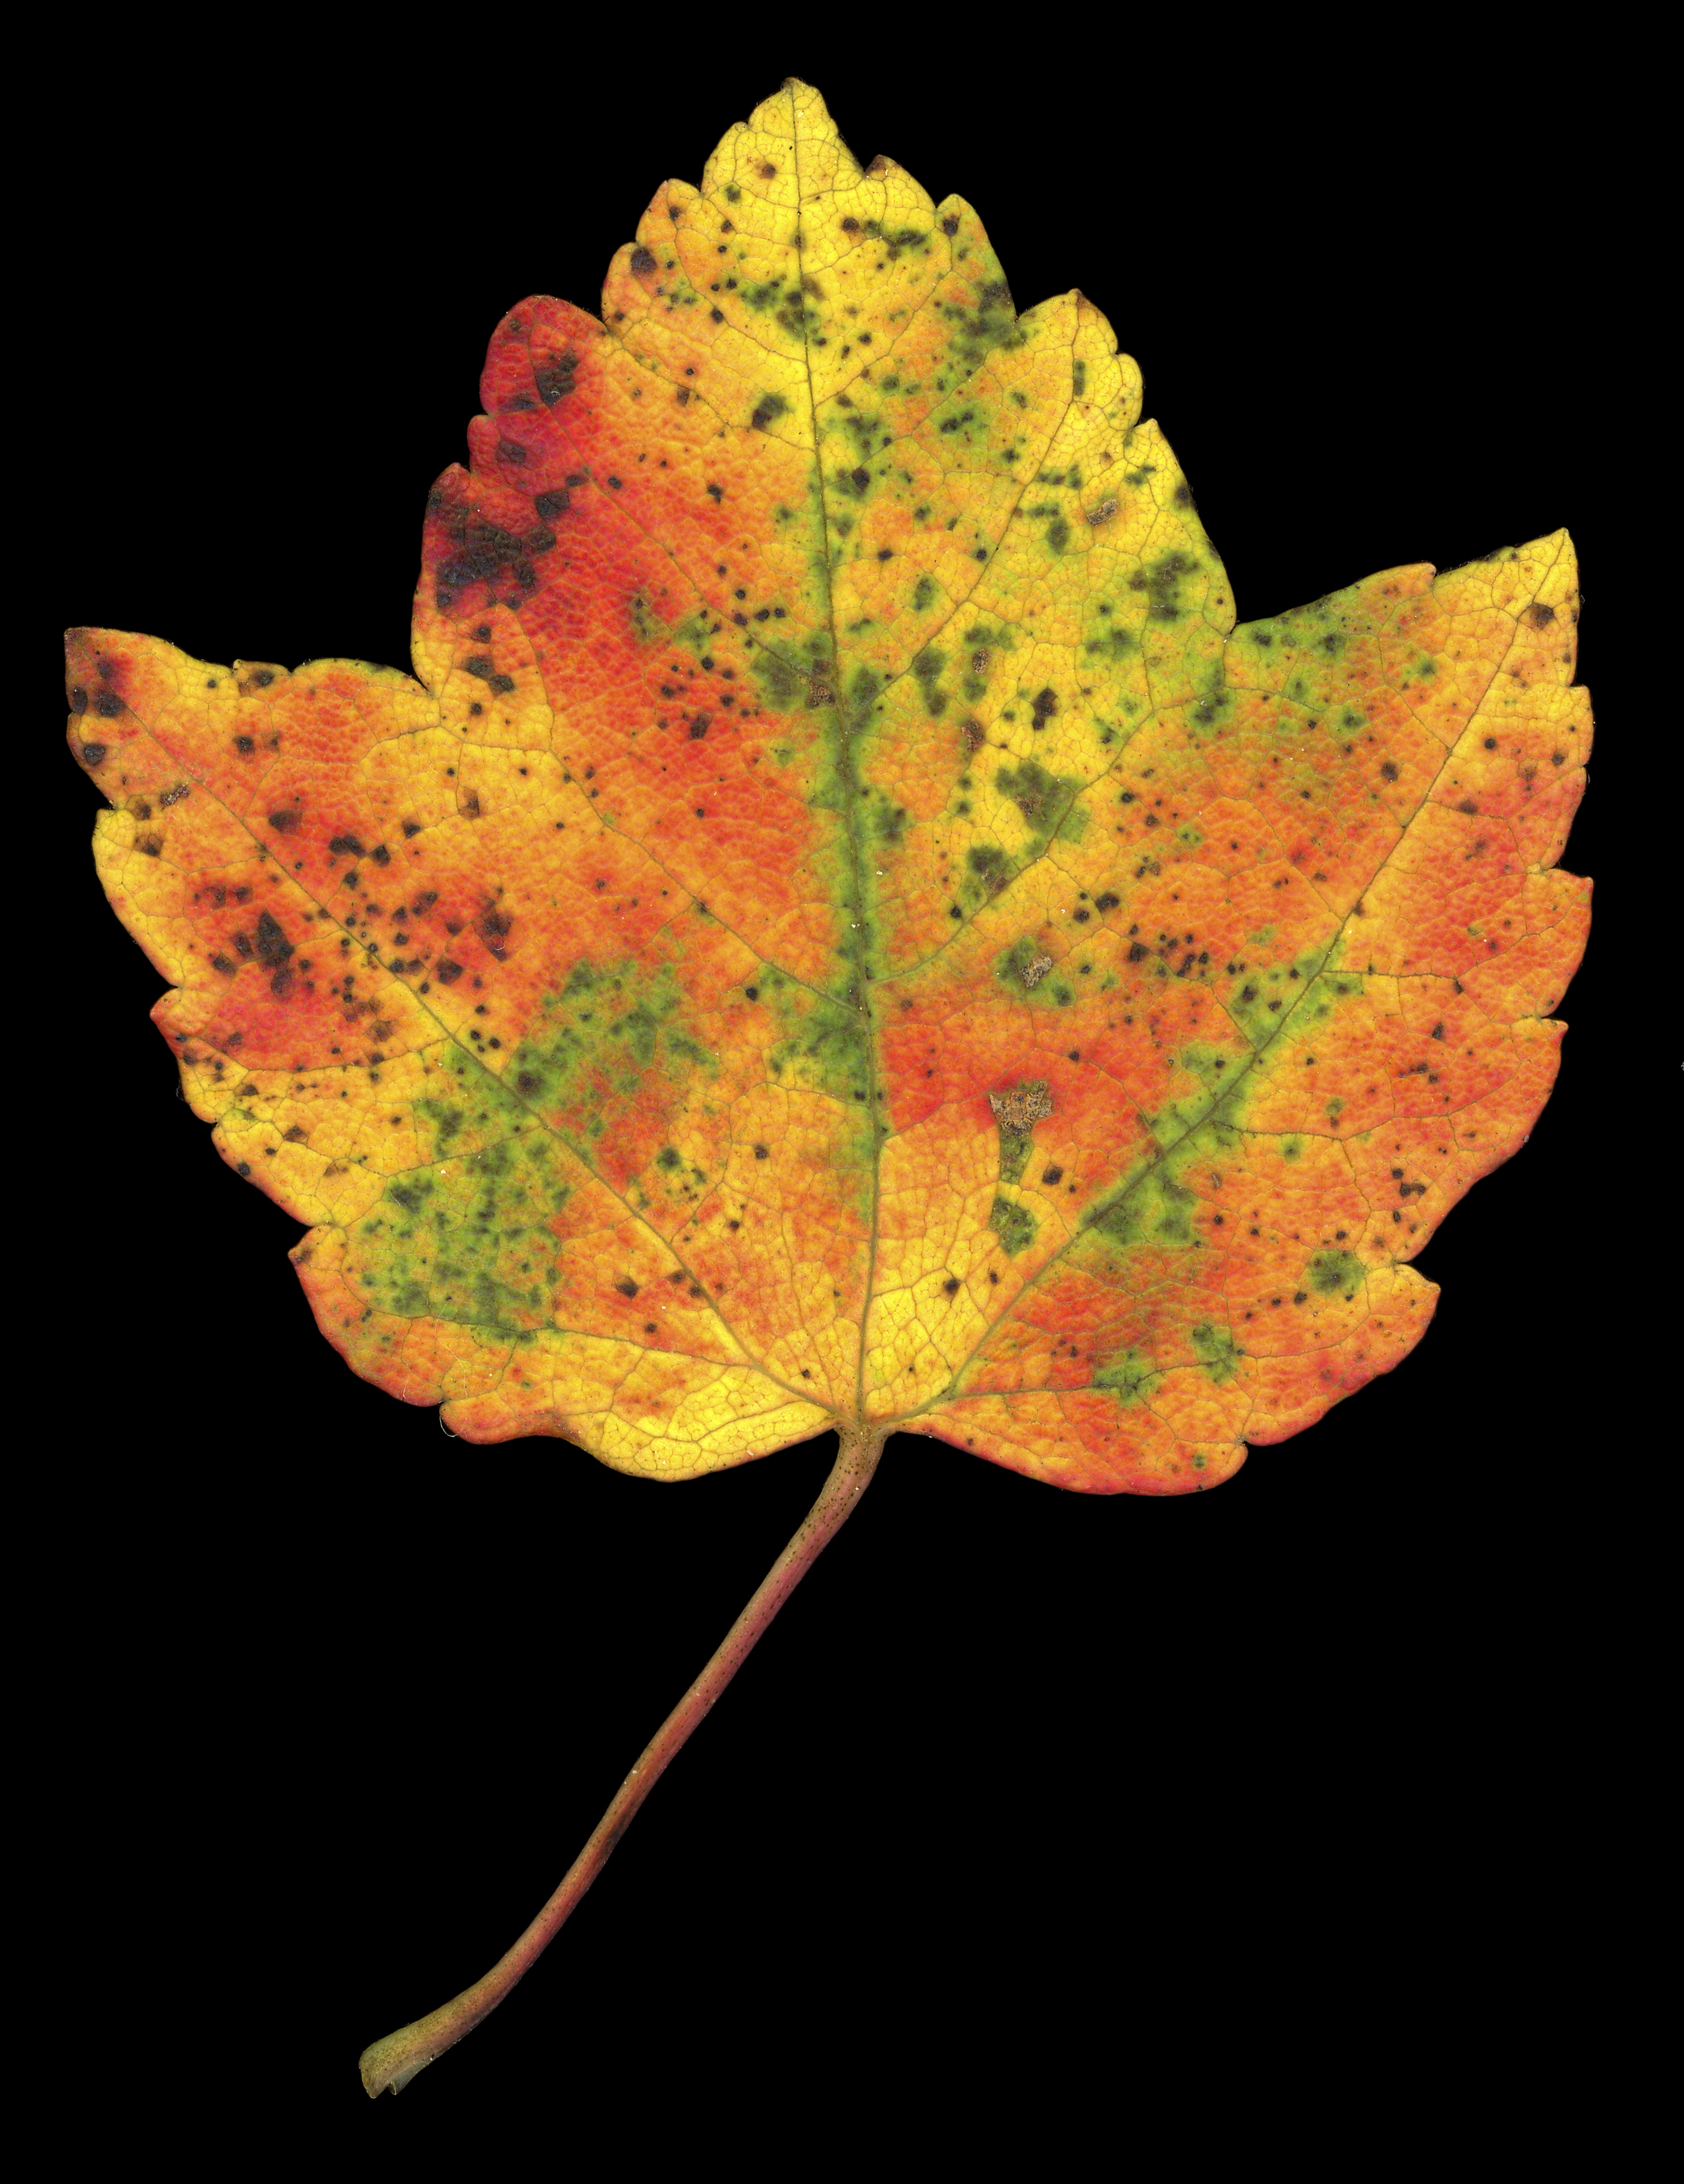
You can see the final result at http://www.dl-c.com/Images/Leaf.jpg -- the actual leaf was only about 1 inch wide.
Masking Tip
Moderator: jsachs
Masking Tip
Jonathan Sachs
Digital Light & Color
Digital Light & Color
Re: Masking Tip
Really, very nice colors.
I guess a will have a job for my idling scanner for the upcoming months.
One question, is there any particular reason you use velvet and not some other black cloth, paper, or some kind of black fabric?
I guess a will have a job for my idling scanner for the upcoming months.
One question, is there any particular reason you use velvet and not some other black cloth, paper, or some kind of black fabric?
Re: Masking Tip
Velvet, for all its flaws, is still less reflective than most other fabrics and papers, although flocked paper may be a little darker. I like fabric though since it's durable and you can fold up a piece and keep it in your camera bag.
Jonathan Sachs
Digital Light & Color
Digital Light & Color
Re: Masking Tip
Thanks for the tip. I will give it a try as soon as I have my scaner running again.