| use arrows to turn the pages. |
Using the original image and this mask together enables changing the contrast and density in the water/cloud area without affecting the surrounding areas:
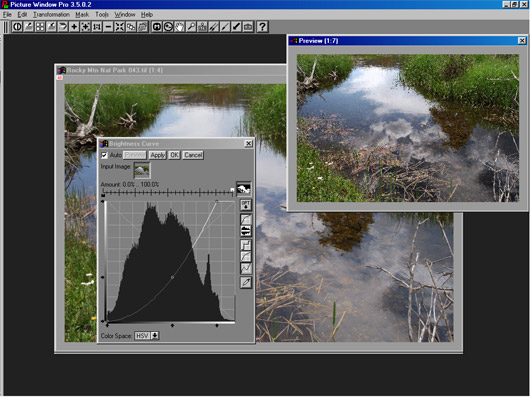
Above is shown the application of a Brightness Curve transformation to the image through the mask just made. Note the mask image is selected in the little box to the right of the Amount sliders. When an amount mask is chosen, the slider scale shows two “knobs”, one black, one white. The setting of the black slider will be applied to the image “under” the black part of the mask, and the setting of the white slider applied to the image “under” the white part of the mask. The resulting image can be seen above in the preview window. The settings can be changed and the results observed immediately if the “Auto” preview box in the upper left corner is checked.
Note that a mask may be a continuous tone image, rather than just black and white. If the mask is a continuous tone image, the image under the gray levels between black and white will be transformed at amounts between the settings of the black and white sliders. The enables some powerful effects to be applied.
| use arrows to turn the pages. |